The visual editor for webforJ
See the app your Java built. Change it while it runs.
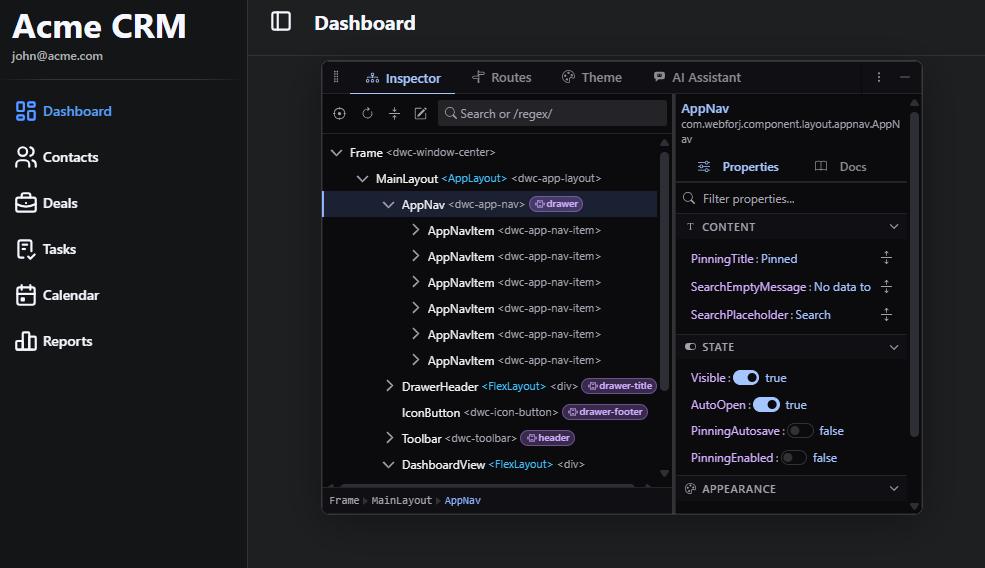
craftforJ runs inside your app in development mode. It shows the component tree your code created, lets you change properties live, and writes the changes you keep back into the Java file that created them.
Four shortcuts cover the loop
- Open or closeAltShiftD
- Pick a componentAltShiftC
- Review changesCmd/CtrlS
- Undo a changeCmd/CtrlZ
How it works
It reads your app through webforJ itself
That is why it describes the app in the terms you wrote it in. The tree lists your components, the properties are the ones your components declare, and the routes are the ones your router registered, with the access rules you annotated them with.
- 01
Open
Click the trigger button over your app, or press Alt+Shift+D from anywhere in it.
- 02
Pick
Press Alt+Shift+C, hover a component and click it. The tree selects it and the sidebar fills with its properties.
- 03
Change
Edit a property. The running app updates immediately, and your files stay untouched.
- 04
Keep
Review the change as a diff and apply it to the Java file that created it.
A tour of the panels
The panels, over a real app
The component tree your Java built
The Inspector lists your components, not the markup the browser rendered. A Composite appears as the class you wrote, holding its children in the order webforJ holds them.
- Press Alt+Shift+C and click anything in the page to select it in the tree.
- Change a property in the sidebar and the running app updates immediately.
- Trace a component back to the Java line that created it.
Back to source
It edits the Java, not a copy of it
Take a form with a Save and a Cancel button. Select Save, right-click it in the tree and choose Remove from source. The declaration, the theme, the listener, its place in the add() call and the ButtonTheme import nothing else uses are gone. Cancel stays.
Before
import com.webforj.component.button.Button;
import com.webforj.component.button.ButtonTheme;
import com.webforj.component.layout.flexlayout.FlexLayout;

public class ContactFormView {
  public ContactFormView(FlexLayout layout) {
    layout.setSpacing("1em");
    Button save = new Button("Save");
    save.setTheme(ButtonTheme.PRIMARY);
    save.onClick(event -> {
      save.setEnabled(false);
    });
    Button cancel = new Button("Cancel");
    layout.add(save, cancel);
  }
}
After Remove from source
import com.webforj.component.button.Button;
import com.webforj.component.layout.flexlayout.FlexLayout;

public class ContactFormView {
  public ContactFormView(FlexLayout layout) {
    layout.setSpacing("1em");
    Button cancel = new Button("Cancel");
    layout.add(cancel);
  }
}
Two settings, both required
craftforJ needs webforj.debug and webforj.devtools.craftforj.enabled. Neither does anything on its own.
Local access by default
Only a browser on the machine running the app can reach it, until you name another machine in hosts-allowed.
No added HTTP surface
It adds no endpoint, servlet or filter. It works over the connection your app already has.
Writes only what compiles
A removal from source is only written if the result still compiles, and files are never deleted.
Getting started
Turn it on in three steps
craftforJ ships with webforJ, so there is nothing to download separately. Projects created with startforJ or from a webforJ archetype come with it enabled. Run the app and go straight to step three.
- 1
Add the dependency
Add webforj-devtools to your project if it is not there already.
pom.xml<dependency><groupId>com.webforj</groupId><artifactId>webforj-devtools</artifactId><version>${webforj.version}</version></dependency> - 2
Enable debug mode and craftforJ
Set both properties in webforj.conf, or in application.properties for a Spring project. craftforJ only works when both are enabled.
webforj.debug = truewebforj.devtools.craftforj.enabled = true - 3
Restart, reload and open it
Open the app from the machine that runs it. A trigger button appears over your app. Click it, or press AltShiftD from anywhere in the app. The same shortcut closes craftforJ again.
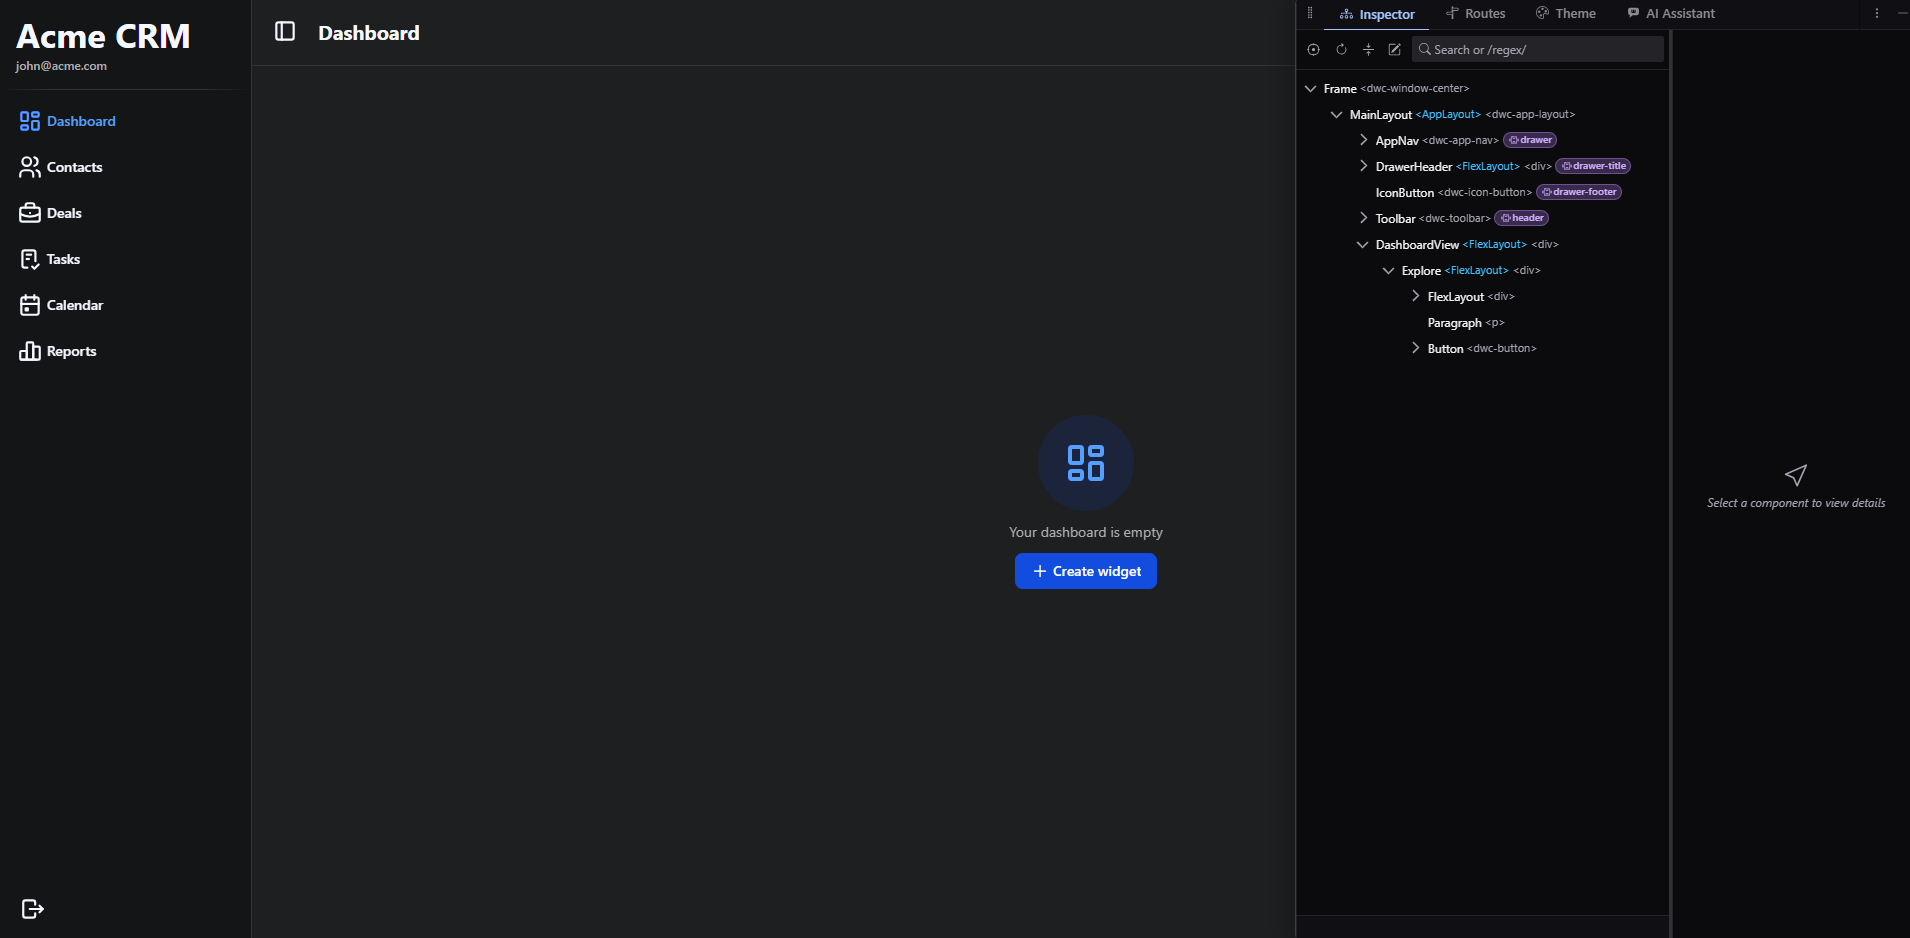
craftforJ floats over your app by default. Drag it onto an edge to dock it there, or move it into a browser window or tab of its own for a second monitor.
Where next
Every panel has its own page in the docs
webforJ is the full-stack Java framework for business web apps: you build the whole app, screens included, in Java. craftforJ ships with it and works on the app you are running.
- OverviewWhat craftforJ is and what it gives you
- Getting startedThe dependency, the settings and opening it
- Inspecting componentsThe tree, picking, properties and the source viewer
- Applying changesPending changes, the review, undo and redo
- RoutesThe routing table, navigation and access rules
- ThemeDesign tokens, presets and saving to your stylesheet
- AI assistantThe agent, its approvals and choosing a model
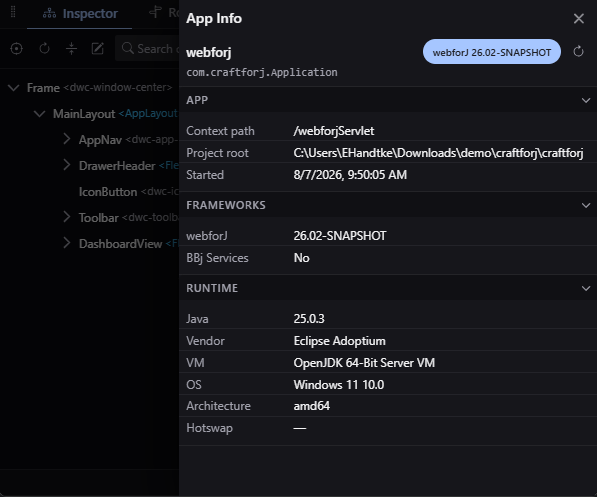
- App infoVersions, the Java runtime and the project root
- ConfigurationEvery property, its default and the feature flags
- SecurityWhat it can reach and how to confirm it is off