Local BLS License
A local BASIS License Service (BLS) lets a webforJ app request a license from a service running on your development machine or internal network. This setup is useful when you have a serial number and authorization number and want the project to use the generated local license files instead of the default license configuration.
A webforJ project made with startforJ includes two license files under src/main/resources:
src/main/resources/blsclient.conf
src/main/resources/certificate.bls
Here's how to replace the default license files with ones generated with a local BLS installation:
Prerequisites
Before you start, make sure you have:
- Java 21 or Java 25 available to run the BLS 26 installer.
- A serial number and authorization number.
- A webforJ project with a
src/main/resourcesdirectory. - Access to the machine where BLS will run.
1. Download the BLS installer
To get the BLS installer, go to the BASIS Product Suite Downloads page.
Once you've selected a desired language for the form, go to the Select Product section. In the Product dropdown, select BLS, and in the Revision dropdown, select the latest version. The required Java versions for running the BLS are under the Revision dropdown.
Then, fill in the form inside Contact Information, and select the checkboxes inside Download Terms.
Once you've filled the form, select the Download button to download the BLS installer JAR.
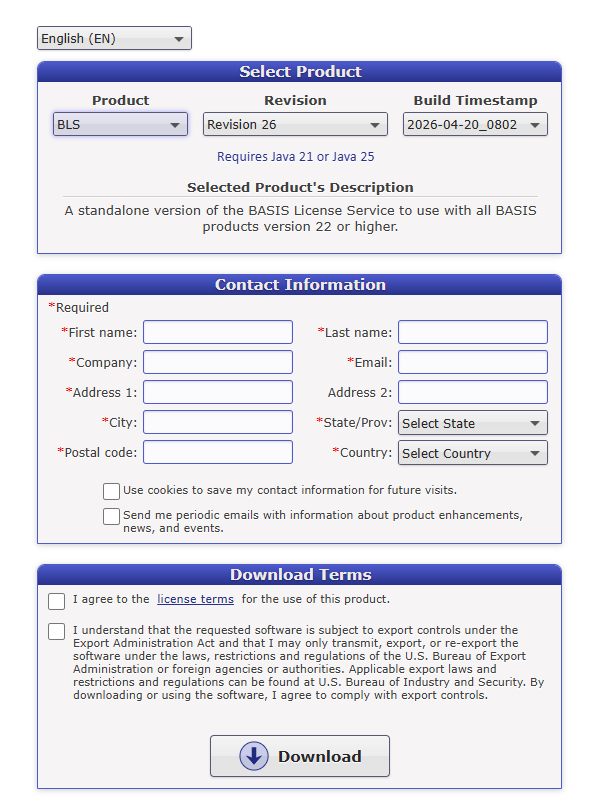
Download form with BLS selected as the product.
2. Install and Configure the BLS
The downloaded executable JAR has the following naming convention: BLS<revision><date>_<time>.jar. Locate the JAR and double-click it to launch the installer, or run it from a command console:
java -jar <downloaded-bls-installer>.jar
Follow the installer prompts and fill in the required details.
By default, the BLS installs in specific directories depending on the operating system, but can be changed in the Directory Selection window. Going forward, <blshome> refers to the installation location of the BLS.
- Windows:
C:\bls - macOS:
/Applications/bls - Other operating systems:
/usr/local/bls
Once you've installed the BLS, it will open the License Registration Wizard.
License registration
-
In the License Registration Wizard, choose the
Retrieve a licenseoption: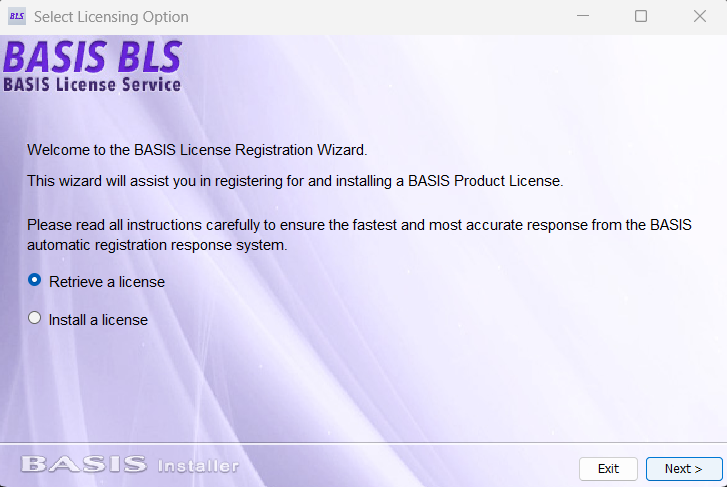
License Registration Wizard with
Retrieve a licenseselected. -
In the next windows, enter your contact information, serial number, and authorization number.
-
When you get to the License Registration and Delivery Methods window, choose
Register and install a license automatically.
After registering your license, finish configuring the local BLS as needed. If, at a later point, you need to change your BLS settings, or retrieve another license, use the BLS Admin at <blshome>/bin/BLSAdmin.
3. Copy the generated license files
Now, go to the <blshome>/cfg directory and locate the generated license files blsclient.conf and certificate.bls:
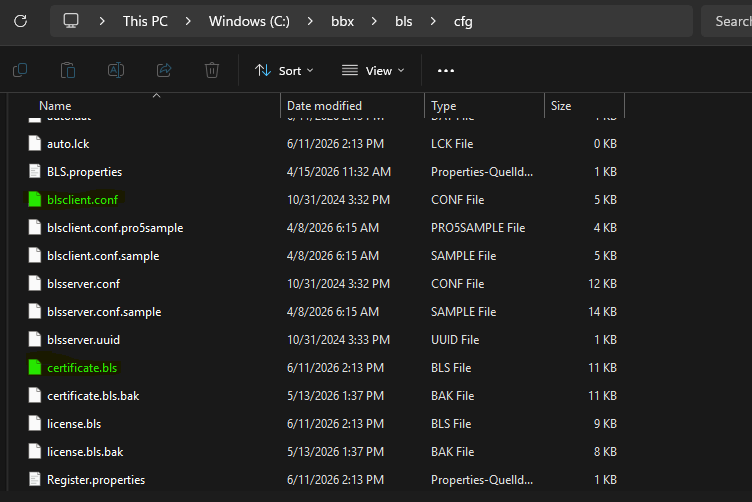
BLS installation cfg folder containing the generated client configuration and certificate.
Copy blsclient.conf and certificate.bls into your webforJ project, and replace any existing files with the same names in the resources directory. Now, when your local BLS is running, your webforJ app requests the license from that service.
src
├───main
│   ├───java/
│   └───resources
│       ├───icons/
│       ├───static/
│       ├───application.properties
│       ├───banner.txt
│       ├───blsclient.conf
│       └───certificate.bls
If your license files live outside the default webforJ configuration directory, you can configure the license directory with webforj.license.cfg.