Getting Started
craftforJ ships with webforJ, so there's nothing to download separately. This page covers what your app needs before craftforJ appears, and how to open it.
Projects created with startforJ or from a webforJ archetype come with craftforJ enabled. If you started from one, run your app and skip ahead to Opening craftforJ.
Requirements
craftforJ attaches to an app only when all of the following are true. If one of them isn't met, nothing appears on the page.
Add the dependency
Add webforj-devtools to your project if it isn't there already:
<dependency>
  <groupId>com.webforj</groupId>
  <artifactId>webforj-devtools</artifactId>
  <version>${webforj.version}</version>
</dependency>
Debug mode and the craftforJ flag
Add the following properties to your project. If you have a standard webforJ app, set the properites in webforj.conf. For a webforJ project using Spring, set the properites in application.properties.
webforj.debug = true
webforj.devtools.craftforj.enabled = true
craftforJ only functions when both of the properties are enabled; therefore, an app that goes to production with debug mode left on doesn't expose your source tree.
A local browser and a developer license
Open the app from the machine that runs it, and make sure you have a valid developer license. To reach craftforJ from another machine, add its address to hosts-allowed.
Once these are in place, restart the app and reload the page.
Opening craftforJ
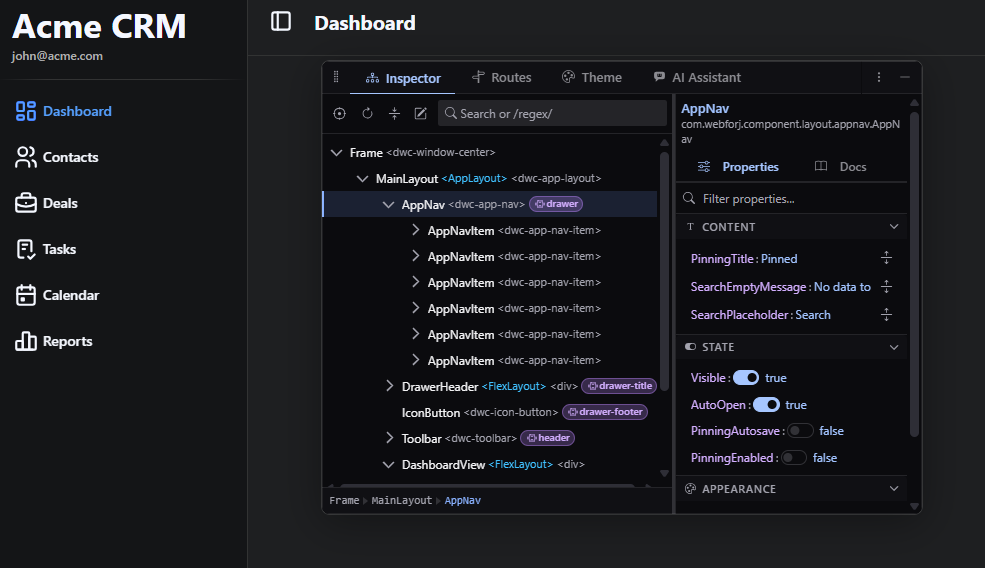
When craftforJ is active, a trigger button appears over your app. Click it to open craftforJ, or press Alt + Shift + D from anywhere in the app. The same shortcut closes craftforJ again, and you can drag the trigger to whichever corner suits you.
Its tabs cover the component tree, routes, the theme, and the assistant. Settings and app information sit alongside them.
- The trigger is the button that opens and closes craftforJ. It stays out of the way while craftforJ is closed.
- The tab strip runs along the edge nearest the app and switches between what craftforJ shows you.
- The window menu holds everything about where craftforJ sits, covered in Where craftforJ sits.
craftforJ writes each shortcut using the modifiers of the platform you're on, so Alt appears as ⌥ and Ctrl as ⌘. Press Shift + ? in craftforJ to see the current list.
Where craftforJ sits
craftforJ floats over your app by default. Drag it anywhere on the page, resize it from any edge, and minimize it back to its trigger when you want the app to yourself. Dragging it onto an edge of the page docks it there, full height or full width, and each edge keeps the size you gave it. Dragging it away from the edge floats it again.
craftforJ is drawn on top of the page. Your app doesn't resize, and nothing in it moves out of the way, so whatever sits under craftforJ is hidden while it's there. To see what's underneath, move craftforJ to another edge or take it out of the page.
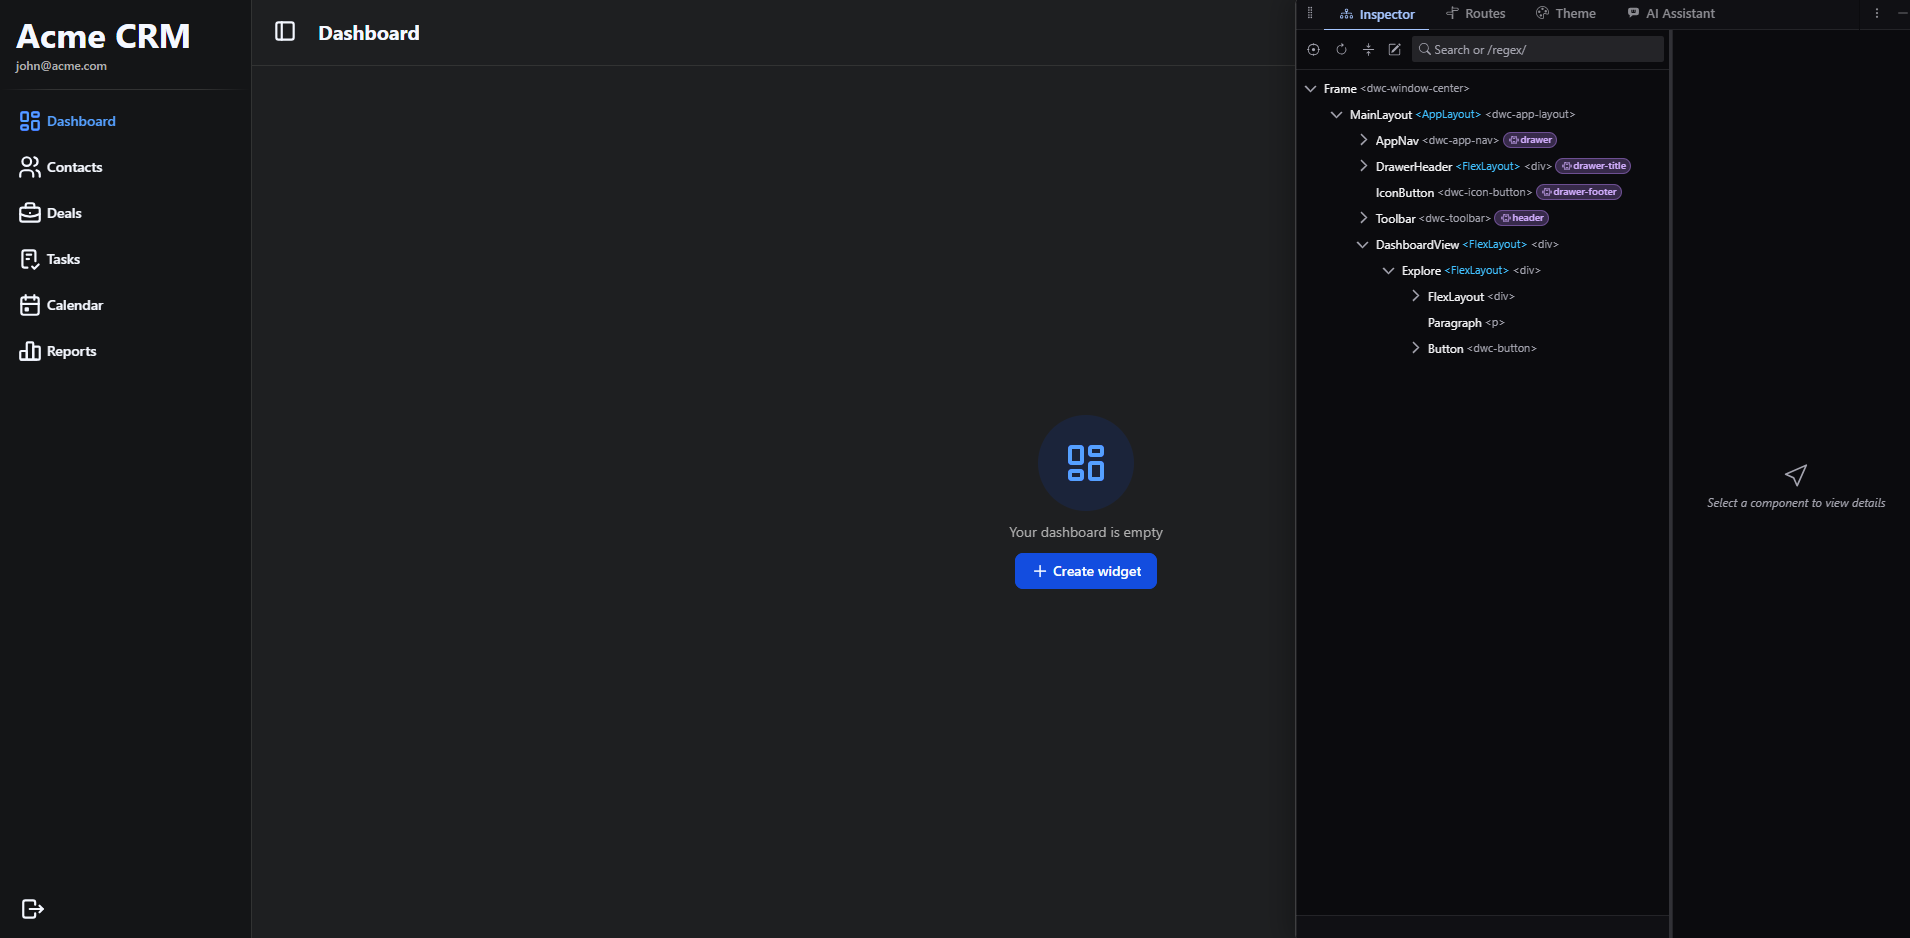
To stop covering the app at all, move craftforJ out of the page and into a browser window or tab of its own, which suits a second monitor. It still inspects your app through the page that opened it, so leave that page open. Navigate it away or close it and craftforJ has nothing left to inspect until you open the app again.
Choose a tab rather than a window if you use Chrome's split view, which puts your app and craftforJ side by side and accepts only real tabs. Right-click your app's tab, add it to a new split view, then pick the craftforJ tab.
Chrome provides the side-by-side arrangement, not craftforJ. Other browsers have no equivalent, so craftforJ in other browsers opens in an ordinary tab you switch to. craftforJ itself works the same either way.
Moving craftforJ into another window ends a reply that's still streaming. craftforJ asks first, and everything written up to that point stays in the chat.
Making a first change
- Press Alt + Shift + C to start picking a component.
- Hover over something in your app and click it.
- The tree selects that component, and the sidebar fills with its properties.
- Change a property. The running app updates immediately.
The change affects the app in front of you only. Your files stay untouched until you review the change and apply it, which is covered in Writing changes to source.
If nothing appears at all, work through Troubleshooting.